Wednesday, 25 February 2015

Product Highlight: Texture paste + Black Sand and SATW Feb Moodboard

Hello peeps,

I'm on the Lulupu blog today with some tips on how texture paste and black sand were used to create the background and layer in this layout. Click here to read the full post.

The grunge and torn (plank type) layers are inspired by the wooden bridge and boat in this moodboard from Scrap Around The World.
The quote though, was what caught my attention and my mind wandered off interpreting 'unimaginable' - awe inspiring, wonderstruck, achieving the unattainable? and that formed the basis of this layout.
I'm drawn to vintage doorways and got to see plenty on our Europe trip a few years ago. I had been waiting for an idea to click and this moodboard did that for me :)
 
Lots of Prima products on this one: mediums, Sunrise Sunset papers, flowers, metal trinkets, glass beads, stencils and sprays. Here is the final layout

Also playing alongwith Simon Says Stamp - Monday Challenge - Anything Goes

Thank you for stopping by today, have a nice day
Cheers,
Kripa
 

Monday, 2 February 2015

Inspire your heart with art day

This week, I seem to be on a roll. No idea how I manages time to complete all this, but very happy that I could :)

Today's art journal page was made with no challenge criteria in mind, just for the sake of art. for the last few days I've been wanting to make something along the lines of - Its certainly very important to count our blessings and not just linger on our trouble and burdens, but taking that to the next level would be to make our blessings count.

If you have time today, join the fun at Unruly Paper Arts who are celebrating 'Inspire your heart with art' Day.


Ive used watercolours, stamps and watercolour pencils to make this page.
 
 
Thank you for stopping by today.
Cheers,
Kripa
 

Sunday, 1 February 2015

Mixed Media Card Challenge - February Challenge

 
My second post for the day. You can check out my mini album and tutorial posted earlier today here.
 
This month, the theme at the Mixed Media Card Challenge is
 
 
Here is my card. I wanted a much softer look, but I guess the new paints I tried gave a much stronger contrast than expected.
 
The base is Prima Princess pattern paper with clear and white gesso, texture paste and paints then a layer of chipboard, also guessed and painted on with teal.
Final layer is just the flowers, resin frame and sentiment
 
 
Thank you for stopping by.
Love,
Kripa
 

Love you Sweets - Mini Album and tutorial

Hello friends,

I'm really overwhelmed by the comments, visits and likes on both Facebook and my blog for my previous post on the mixed media canvas. Your appreciation means a lot to me so heartfelt thank you.

I'm on the Lulupu blog today announcing the new challenge for February. I hope many more of you will be able to participate, going forward challenges will be open for the whole month. One theme and a whole month to come up with entries. The DT will continue to present challenge related inspiration. But in addition, they will also bring you tips, tutorials, product reviews and projects throughout the month. 

So lets get started with
 
Lulupu Challenge #46
Love you SWEETS
Twist - Use Red or Pink
(Click here to read the general guidelines)
 
1. Anything goes - so you can make a card, layout, canvas, mini album, 3d project etc.
2. Emphasis on Sweets - use it in the sentiment, title or literally - cupcakes, candies, chocolates..... use your imagination
3. Don't forget the twist - Include Red or Pink in your project. You can use both too if you want.
4. You have until 28 February, 2015 11:55 IST to submit your entries.

 
 Here is my project for you all. Its a valentines themed flip up mini album. The spine is an old photo frame from IKEA. The first page is a cupcake shaker placemat and I have a tutorial on how it was put together.
The first step is to get the layers ready. They have been numbered in the image below, so that its easy for me to explain each one.
1.  Full image x 2 cut out of pearl paper to form front and back of the shaker placemat.
2. Outline x3 chipboard for the inner portion of the shaker, to give depth and form the cavity that holds the sequins.
3. Outline solid x 2 acetate sheets.
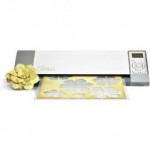
All of these were cut using the Silhouette Cameo and I designed it using some free shapes on the internet.

NOTE: The order of assembling the shaker is important.
Full image – acetate – 3xchipboard – acetate – full image
If you want to stamp or colour the full image cut-outs, its best to do so before assembling the shaker. Attach the embellishment later.
Stack-up the three pieces of chipboard and stick them together. Wet glue works well as you can move around the pieces and adjust the alignment.
Here is a close up of the shaker card
The sequins are confined to the shape of the cupcake, so the placemat can be strung through ribbon or rings to bind into a mini. Also, the shaker is identical from front and back.

Wanted to try something different and really happy with the outcome.
Wishing you all a great crafting week!

Thursday, 29 January 2015

Hope-Strength-Courage MM Canvas + tutorial

Hello friends,

Today I have a tutorial to share and a project that I've become very very fond of. When I took to paints and brushes two years back, it was to help me relax and cope with the flurry of events in my life. But, I never really got to pen (paint) what I was going through at that time - probably didn't have the courage. I remember then, the prettiest of flowers couldn't make me smile, all I saw were the thorns. I prayed everyday that God give me the strength to accept what was happening, the ability to make the right decisions and the courage to go through with them.
2015-January-BAP-Jennifer
Beautiful prima flowers, papers, resin, sugar dots and finnabair mediums, mica, glass beads, glass glitter make up this canvas. The sketch is inspired by the January Prima BAP. Also joining Finnabair's Sparkle and Shine challenge.
 
The colours and texture are inspired from this moodboard at Sassy Scrappers - glass glitter from the S, pinks from the H, crackle and green from the I, blues from the N, flowers from the E and finally something shiny - gold paints, glitter glass, beads, mica and sugar dots.  Actually, the flowers, angel and some of the stamps are from a happy shopping spree on their store.  
The base of my project is a 5x7 canvas covered with a layer of lace, prima princess paper and a couple of strips of washi tape.
 Over it I've applied clear crackle texture paste through a Prima stencil and once dry start adding more colour - the first later of colour was distress inks and watercolours
Then collage strips of leftover paper from Prima Princess using gel medium. Once dry cover with a thin layer of clear gesso. In some areas use white gesso to tone down the print on the paper. One dry, stamp using Prima stitches, script and other stamps.
 Some subtle touches of blue and teal using mists and watercolour pencils then apply texture paste through same stencil. Allow to dry.
More blue and pinks added using watercolours, silks and watercolour pencil. Gold paint on some of the raised areas of texture paste. A little bit more stamping and paint splatter.

Mix mica flakes, glass glitter and glass beads individually in gel medium and apply in an almost cross pattern. Basically I want it to peek through from below the main layering. Once happy, assemble the rest of the layers on top of this base.

 Final touches of more colour, sugar dots, beads and glitter so everything ties in together as one piece. Finally some sunshine today after days of rain, so was able to photograph in natural light.
 
Thank you so much for visiting me today. Have a lovely day.
Cheers,
Kripa


Monday, 19 January 2015

3D with Silhouette Cameo

Hello friends,

Happy Tuesday to you all. I hope you found some crafting time this weekend to join us in

Lulupu Challenge #45

3D with Dies (or a die cutting machine)
Click here for all the details and rules

Tanvi Shah presented us with a beautiful shadow box + tutorial last week. If you haven't already started making your submission, I hope my project inspires you to try.

This project is another first attempt for me - traditional scrapbooking technique - paper piecing and layering. No inks, or stamps just paper and glue. Also, my first big project using the Silhouette Cameo. Here is a close up, any guesses?

Its a carousel which also doubles up as a cupcake holder. All papers have been cut using the Silhouette cameo -  plain, textured, glitter and pearl cardstock . Its definitely a dream machine, I could never have created this project without this die cutting machine. The cut file for the carousel is from www.svgcuts.com

There is place for 8 cupcakes and the horses are meant to be cupcake toppers. If you look closely, you can see that the horses have been temporarily fixed to the cupcake wrappers using washi tape. They can easily be removed later and inserted into the cupcake.
The top of the carousel can also be removed, there is enough place for a card and a light weight gift.
 
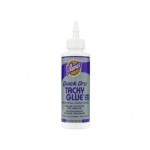
The biggest challenge I faced was what glue to use. After some trial and error, I used a combination of dry and wet glues. Just curious - what glue and brand do you use for projects like this?
 
I hope this post made your Tuesday a little more inspired 
So, dust those dies or cutting machines, take a leap of faith like I did and share your creation here with us.

Supplies from the Lulupu store
 

Saturday, 10 January 2015

Happy New Year & Lulupu Challenge #44


Hello friends,
 

Hope you have all had a great start to the New Year.
I had a nice long break over the last couple of months.... and when I got back home was itching to try something different and the current challenge offered just that.
 
Challenge #44 - Fancy Folds card + punches
Click here to read the full post and challenge guidelines.

If you've seen my work, I hardly ever leave a pattern paper as is. I have to alter it in some way, stamps, gesso, paints. So, this time I decided to stay away from any wet medium. It was very difficult, but an hour later this was born. Its a slider card, with place for two hidden messages. This is what it looks like closed.


Lots of measuring, scoring and lining up edges, couldn't have done it without  Martha Stewart Tools Scoring Board. Pull the tab and the images slide up like so. The Welcome Baby Boy banner is glued only on the edges and the baby image on pop dots so that the tag can easily slide in and out.
View from the top. There is place for another short message on the top too. These papers are a combination of Kaisercraft Bundle of Joy and Pitter Patter Kaisercraft Paper Pad 6.5"X6.5" 40/Pkg. Not only do you get both pink and blue pattern paper in the same pad, there are also 4 sheets of die cuts making it very easy to embellish a project. My favourite though are the sheets with cute vintage baby images - have fussy cut the crane from it.

 This slider has been mounted onto a pearl 6inchx4inch cardstock with lots of room for a personal message to the new parents.

I have few more projects to share but now I'm off to visit all of you dear readers who I haven't visited these last few weeks.

LinkWithin

Related Posts Plugin for WordPress, Blogger...